Mandarin Chinese Flashcards
Summary
My Mandarin needs… work. For starters, I realized not long ago that I lacked vocabulary for many everyday objects and activities. Of course, it’s possible to memorize list after list of vocabulary words and their English translations in a rote manner, but this is both uninteresting and inefficient. I wanted a means to learn a huge amount of vocabulary very efficiently while seeing (and therefore thinking about) as little English as possible. The solution: create high-quality picture dictionary flashcards for use in spaced repetition software; specifically, Anki.
Goal
Create flashcards for over 2,000 Mandarin vocabulary cards, complete with both traditional and simplified characters, native speaker pronunciation audio, images, and other information using automation as much as possible so that more time can be spent learning Mandarin instead of creating cards.
Approach
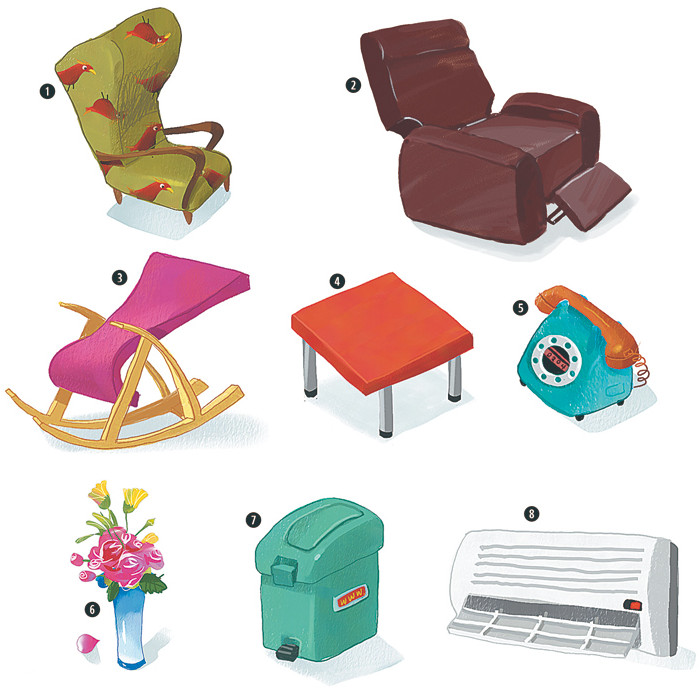
I found a very nice, albeit dated, picture dictionary a couple of years ago that has been sitting around on my bookshelf. It contains informative and rather goofy illustrations that are a lot more interesting to look at than the collection of stock images that frequently appear in other picture dictionaries. It has both traditional and simplified characters. It comes with CD-ROMs (remember those?) loaded with audio of native speakers pronouncing each word, as well as some extremely old and clunky software that’s not very appealing to use. Overall, it’s quite nice, but I wasn’t learning much from it and it had been gathering dust. However, the book struck me as a great source for creating flashcards for use in spaced repetition learning software.
Of course, it’s possible to create the cards by laboriously entering, for each and every word, the traditional and simplified characters along with their English translation (for reference), the pinyin, the zhuyin, and the name of the lesson; scanning, cropping, and cleaning up each illustration in the book; ripping the audio from the CDs and chopping it up into individual files; and, finally, associating all of the information together. However, besides being a terribly boring proposition, attempting this with a book containing over 2,000 words would require months and months of indefatigable commitment – all time I could otherwise be spending learning more Mandarin – and, just as concerning, would be extremely prone to transcription error. This approach certainly would not do.
I realized quite quickly that the software that came on the CDs had all of the assets (vocabulary, images, and audio) that I wanted, stored using an old Microsoft Access database that is almost trivially easy to hack. Once I had access to all of the underlying assets, it was time to figure out a way to turn them into flashcards.
(I’ll mention here that I did attempt to contact the publisher, expressing my interest in turning their software – specifically, an even older iPhone app that the publisher developed and no longer offers or supports – into flashcards, but their contact didn’t seem keen on helping me get the project going.)
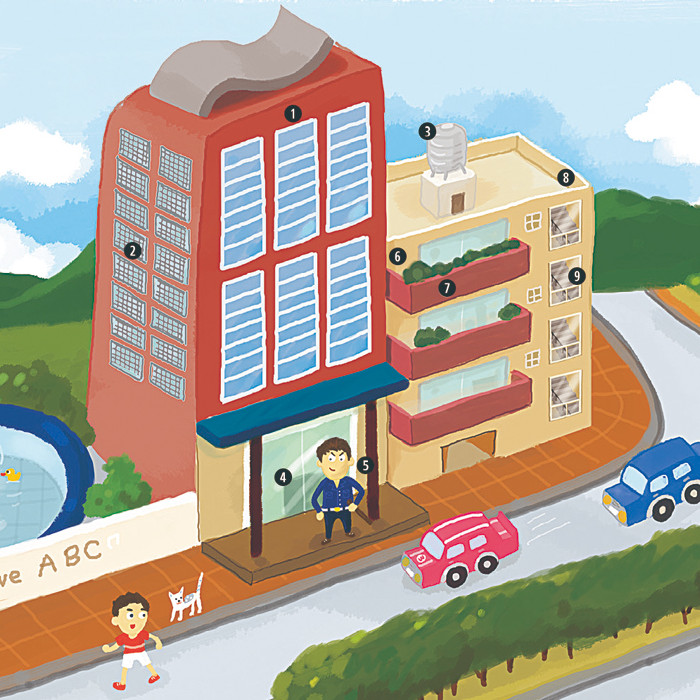
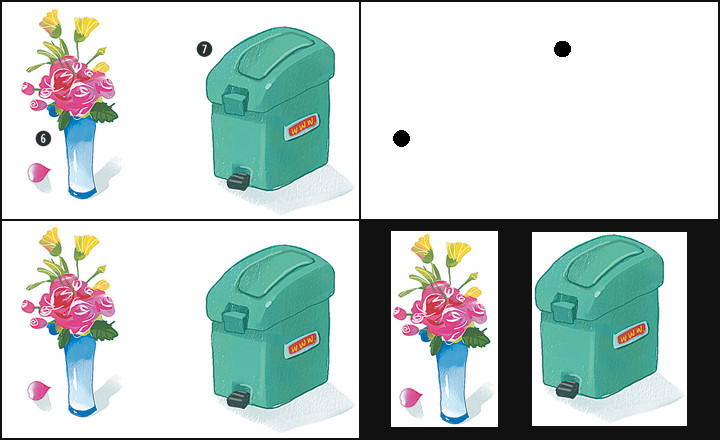
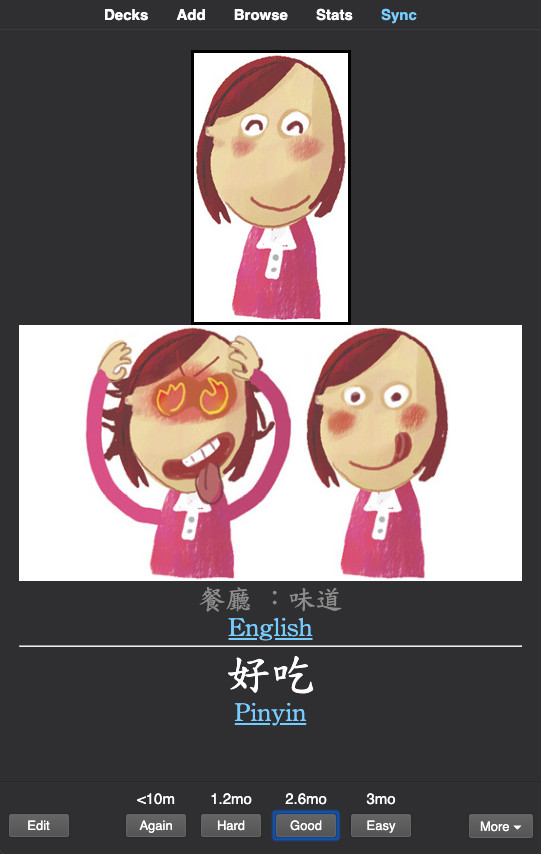
Each image file (which corresponds to a page or two in the book) contains either a collection of small illustrations for each word with an adjacent number bubble for identification, or one large illustration with the number bubbles overlaid on the image. In the case of images with collections of smaller illustrations, I identified and removed the number bubbles by first thresholding the image to produce a binary, then applying connected-component labeling to the binary image, and then removing all components below a specified area threshold using ImageMagick. From there, it was then pretty easy to use a fuzzy fill to separate, extract, and crop the individual illustrations using Fred Weinhaus’s multicrop tool .
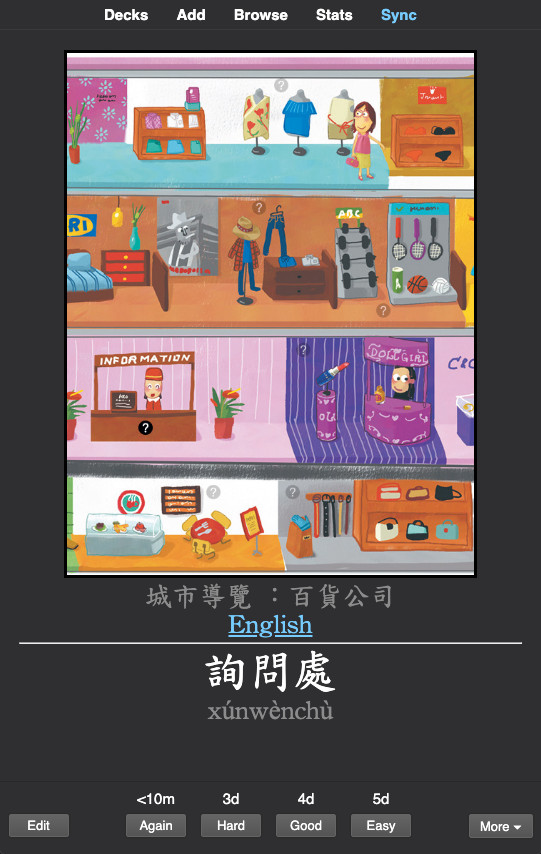
For the large images, I wanted a way to retain the number bubbles, but darken a specific bubble in flashcards that test the vocabulary for a specific part of the image. This could be accomplished with an underlying color image without any number bubbles, and layers with an alpha channel atop this image for identifying individual items in the scene.
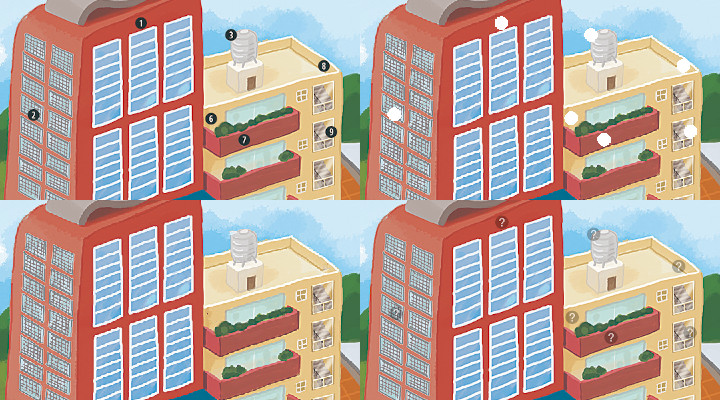
Processing the large illustrations in this way is far trickier than the smaller images, both because the number bubbles are embedded in the images (and are thus more difficult to detect), and because removing them would leave holes behind in the illustrations that need to be patched. Fortunately, the number bubbles in all of the images share three properties: they are black, they are circular, and they are small relative to the illustrations. I used these properties to separate the number bubbles from the underlying image.
For this work, I turned to MATLAB. Thresholding each color channel allowed me to create a mask that picks out only black (or nearly black) items in the image. Connected-component labeling allowed for the identification of individual objects in the image; taking the convex hull of each object filled in the non-black portion of the number bubbles, i.e., the white numbers in the bubble, and generally cleaned up the mask; a circularity threshold removed objects that were not sufficiently circular, while area thresholding ensured that the resultant mask only identified regions occupied by number bubbles; the final mask was then used to remove those regions.
After subtracting the mask, the illustration looks a bit like Swiss cheese since the circular regions that were once occupied by the number bubbles were removed. To fill in the holes, I used exemplar-based image inpainting, which is an extremely interesting, patch-based approach to inpainting that uses surrounding pixel values to guess the missing pixel values and fill in the holes. This often required a bit of touching up – the algorithm isn’t perfect – but it saved a huge amount of time in preparing the illustrations so that they’re ready for use.
The remainder of the project involved formatting audio timestamp entries I found in the software’s database in order to autonomously split the audio files into individual words, organizing all of the information into a single CSV file, and verifying the accuracy of the cards to ensure everything came together as expected.
The project was a great learning experience, as I got a chance to play with image processing tools that I had never before needed to use in practice; many of the techniques I used, such as thresholding or connected-component labeling, are fundamental building blocks in more complex algorithms that find application in, for example, computer vision. I also found the inpainting algorithms fascinating and I hope I get a chance to learn more about them in the future.
Just a couple of months after completing the project, I had already been exposed to over 1,000 new words – about half of the book. Assuming a target long-term retention rate of approximately 90%, one could quite easily memorize the entire book in in a matter of months with a fairly minimal (approximately 30 minutes per day) time commitment. 很好!